Some words on how to install Android on your Odroid-U3 using Linux:
Download the Image from http://dn.odroid.com/4412/Android/
Extract the ZIP-File with your GUI-ZIP-Tool or in Command-Line
Prepare the Micro-SD (USB-Card Reader with your SD)
Clear your SD with dd first: dd if=/dev/zero of=/dev/sdX bs=4M (Depending on the size of your SD, this action can take a lot of time…)
Now we flash the image on the SD-Card: sudo dd if=image.img of=/dev/sdX bs=4M
To safely remove the SD: sync
Now we insert the SD into our Odroid-U3 and first boot will proceed – and it will take some minutes (with black screen) !!! (Anyways At the first booting, the self-installing will take about 1~2 minutes. While installation, the blue LED is blinking and fan is running. The blue-LED will turn off after installation. Turn on again and enjoy.)
If you want to list and write to a txt-File all featureClasses (in a FetaureDataset) stored in SDE/Oracle, it is done with a few line Python.
import arcpy
from arcpy import env
import os

# Set the workspace for the ListFeatureClass function
#
env.workspace = "Database Connections/VECTOR.arcsde01.sde/FEATURE_DATASET"

# Use the ListFeatureClasses function to return a list of
#  all shapefiles.
#
fcList = arcpy.ListFeatureClasses()

print str(fcList)

# setting up output-file and write to file
file = open("sdelayers.txt", "w")
file.write(str(fcList))
file.close()
If you don’t get an image via HDMI on your TFT/TV, sometimes it’s because of a wrong setting… and if you can’t connect to your Odroid with SSH (to run odroid-config), you have got a problem but just a small one.
Put the SD in a Card-Reader and connect it to a Linux-PC.
The first partition, a fat partition will have a file named boot-auto.scr copy it to boot.scr (replace the old boot.scr there)
Now your little gadget should boot with an image on your screen
The Austrian govermental geodata-departments offer a free Basemap for Austria – Basemap.at (http://basemap.at/) – similar to GoogleMaps or OSM, based on official governmental data.
You can access this map via QGIS too – add a WMS/WMTS-Layer and use the following URL
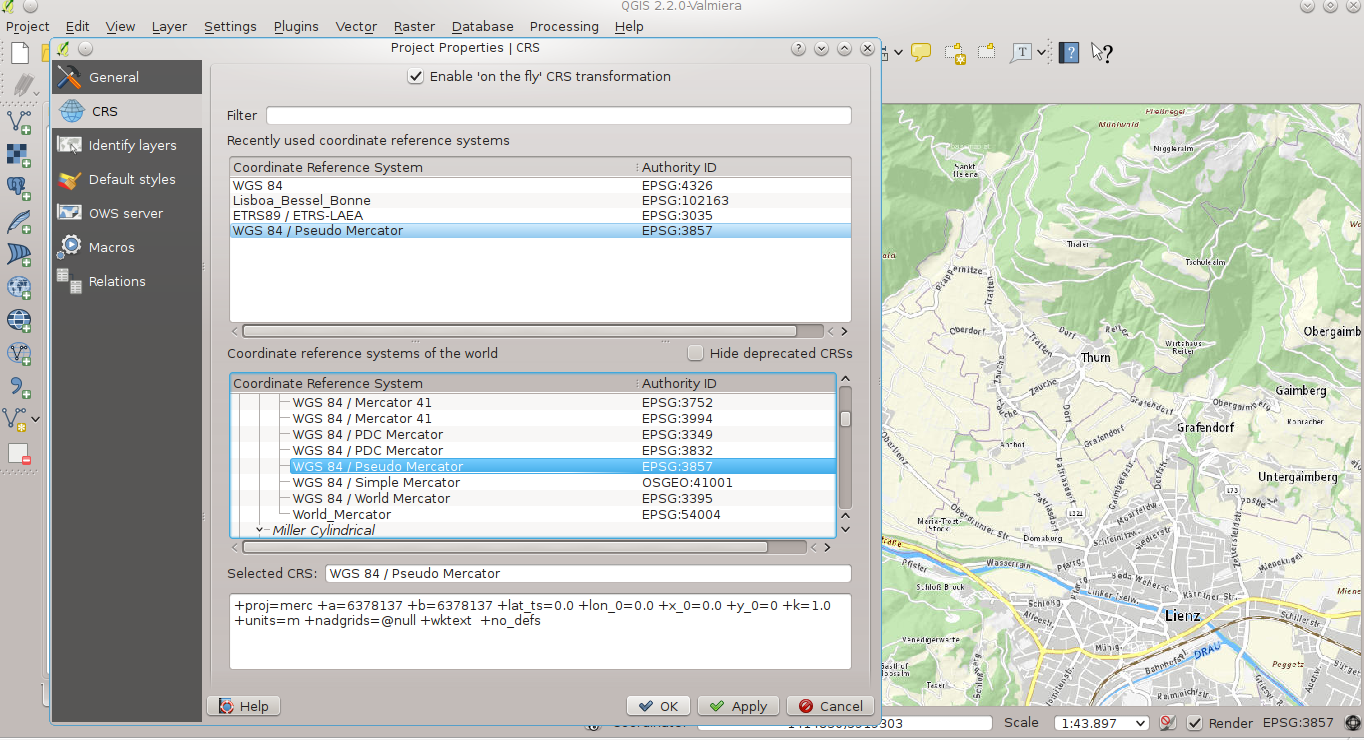
… for the best rendering-quality (no distortions) choose Google’s Pseudo Mercator as Project(Display)-CRS: EPSG 3857 (in QGIS 2.x: Settings – Project properties)
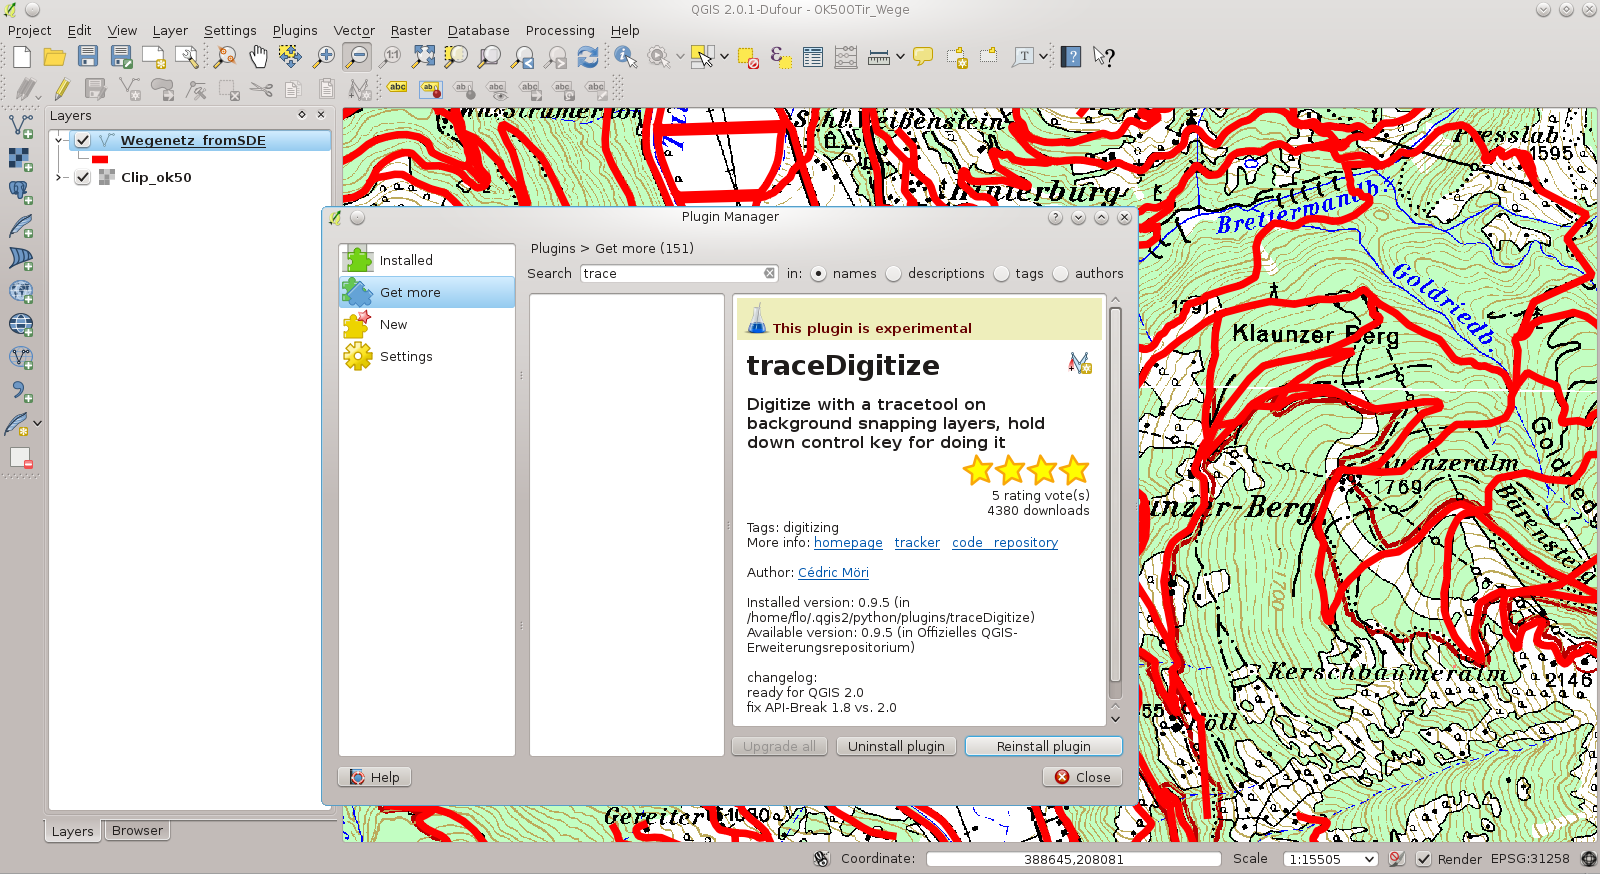
If you want to follow existing vector-geometry (trace it), the plug-in traceDigitize is very helpful. Please be keep in mind to set the Snapping-Tolerance (Settings – Snapping Options).